COVID-19 Crafts! #1
Oh. My. Gosh. This is the closest to the apocalypse we will ever be... Right now! This quarantine has definitely been tough with the social-distancing standards and time apart from close family and friends. But, it will be over soon! It could be three days or five months, I don't know. But I am 100% sure that we are in this together people!
I don't know about you guys, but I have been doing TONS of stress-baking during this lockdown. Because we all have been cooking our butts off, why don't we make an apron for our first craft?
The materials you will need for this project are an apron, iron or heat press, extra cloth, weeding and application tools, scissors, HTV (or heat transfer vinyl), a measuring device, and a die-cutting machine of your choice (I have a Cricut Maker).
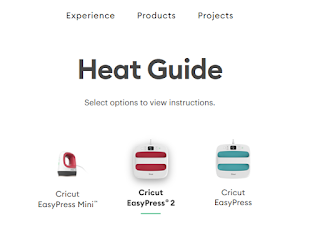
First of all, you need to pick a design. I found this heart design on the Cricut Design Space desktop app in its free section. There are thousands of SVG's in Cricut Design Space, but you have to pay a small fee for the majority of them. Two of my favorite places to find free SVG's are lovesvg.com and svgandme.com (these are for personal use only). Use your measuring device to appropriately size your decal in Design Space. When your decal is ready to cut, press the green button in the top right corner of Design Space. Be sure to mirror your design whenever using HTV! The last thing we want is to waste this expensive material! The mirroring aspect might not matter in pictures like the one I selected, but with images with wording, it is extremely important to mirror. Therefore, just get into the habit of mirroring.Next, place the shiny side of the HTV down on your Cricut mat and adjust the cutting settings to HTV. Insert the mat and let the Cricut do its magic. When the cut is done, take the HTV off of the mat and trim around it. Now, take the corner of the HTV and start peeling at a ninety-degree angle. After that is done, weed out the unwanted scraps inside of graphics or letters. In this case, I wanted to take out the insides of the pretzel that the Cricut cut. Now, adjust the decal on the apron appropriately. I use the Cricut rolling tool to assure it sticks on the apron well. After setting the decal, turn your iron on. If you have a Cricut Easy Press like me, type in "Cricut heat press settings" on any search engine, and it is sure to be one of the top options. If you have a regualar iron, though, just use your cotton setting without any steam. Cover the decal with a stray cloth, towel, or pillow case to ensure no scorching of the decal or apron occurs. The average time of heating the decal is 30-45 seconds while actively moving the iron around and applying pressure. After that first time-span is up, flip the apron over and apply heat to the back of it for five seconds (without the protective cloth). Wait around two minutes after applying the heat to let the decal cool down a bit. It will still be very hot to the touch! After it has cooled down a bit, pull the plastic sheet off at a ninety-degree angle very slowly. If a bit of the HTV starts peeling off, lay the plastic back down and re-apply the heat. Voila! Your DIY Cricut apron is done! Whether you chose a simple monogram or intricate graphic, your apron is sure to look stunning! Hopefully this sparks both the inner chef and crafter in you to ease the pain of the quarantine. Peace out, and never quit being creative!


Comments
Post a Comment